1/05/2015

Looking Back: 2014

Similarly to last year, I can't believe it's already 2015.

This past year has been quite something! As I opened my doors to new opportunities in life, I also opened my blog up to new horizons in BC, Ontario, and Quebec with my temporary move for school and professional development adventures, made and reunited with some wonderful friends, and made and ate some delicious things!

More accomplishments(?) for 2014 include the following...

  • My blog is now over 2 years old!
  • I fell in love with a place called, "The Bag Lady" in London, Ontario.
  • I spent Chinese New Year with extended family in Toronto!
  • I made my first loaf of sandwich bread and made it into French toast for my friends who didn't go away for Family Day.
  • I made some *bleep* good butternut squash soup for the first time thanks to my purchase of a Magic Bullet.
  • I grew my own basil and dill plants, named Hazel and Phil, respectively, but I lost them to aphids because I'm a terrible gardener/horticulturist.
  • I messed up a few batches of my go-to scones because I was too lazy to go out and get shortening or butter.
  • Some guy gave my dad some rhubarb, so I made pastries with it.
  • P and I made a freaking amazing masterpiece for Halloween - the Gastronomicon/Necro-om-nomicon, and devoured the entire thing...*grin*
  • I made lasagna for my parents and they didn't hate it!
  • I put potato chips into cookies and they turned out amazingly. There's no going back now...
  • I made some horrendous samosas that don't deserve to be called samosas - they were so bad that I couldn't even eat a whole one myself. The rest are currently sitting in the deep freeze, and P has said that he will take them, but I am afraid that they will just suffer the same fate as the black bean cookies of yesteryear.
  • Rather than letting my Tim Horton's giftcards from Christmas presents and badminton tournament prizes go to waste (because I am not much of a fan anymore, on the account of my parents going to Tim Horton's several times every week), I used them to provide breakfast and coffee to those who aren't as fortunate as me to have a safe and warm home with more than enough food.
  • P is still my #1 food companion/photographer/fan, and I hope that won't change.
  • I'm nearly at my 100th post! That day will probably call for confetti or something.


Things I want to work on include the following...

  • Getting a personalized domain site up and running!
  • Consistently using better quality photographs when I can afford it. (I still use the camera on my Samsung Galaxy SII, because that's all I have ._.)
  • Try more weird foods and discover new flavours in the world!
  • Find more hole-in-the-wall eateries, because more seems more doable than "all".
  • Broadening my knowledge of culinary techniques and fearing nothing!
  • And as always, maintain my blog so that I can
    • Remember what I ordered at a place I visited for the first time
    • Remember what something I ate looked like
    • Remember the good times and company I've had
    • Remember food and restaurants that I will rarely get the chance to visit
    • Document my culinary ups and downs in the kitchen
    • Share with others
    • Stare at them when I'm bored and there's nothing new on r/food
    • And lastly, to remember places I like to eat at and those that I do not like to eat at and should never go back to.
Thank you to everyone for supporting my continued blogging, especially P and friends who have to wait for me to take pictures of their food before eating. Here's to another year of wonderful food and friends and friendly foods! :)

-M

12/19/2014

B-b-b-baking: Merry Mayhem and Magic

Yesterday was the most intense 90 minutes of constant baking I've done in a while - what I do for Christmas parties... I went to a Christmas party yesterday, and I unfortunately still don't have the funds to buy fancy gifts for everyone, so this year's holiday season is going to be filled with snail mail and baked goods. I was at a meeting in the morning, which ran quite a bit longer than I had anticipated, and I had somewhere else to be just before the Christmas party in the later afternoon, but somehow, I managed. However, because I was in a bit of a hurry, the pictures suffered a bit - not that they are usually that amazing anyways considering how I use my phone camera...

I decided to try two new things this time around - cookies with potato chips in them and biscottis. Yes, potato chips. But let me explain. I had been introduced to the idea of putting other obscure things in cookies about a year ago when my cousins took me to a place called Momofuku Milk Bar in Toronto. They had something called a "Compost Cookie", which had pretzels in it in addition to the potato chips. But when you really think about it...it's not actually that weird. Salty sweet things and molecular gastronomy have surfaced in the culinary world, and it isn't uncommon! Kettle corn has a good mix of caramel and butter and salt, crispy bacon strips are being put into icecream sundaes, so why not potato chips in cookies? So, I gave it a shot, and they were actually amazing. It was your traditional chewy, chocolate chip cookie, but with an extra element of salt and crunch! Magic. And on the slightly less exciting side, I decided to make biscottis. I hadn't made them before until yesterday, but had been wanting to try for a while. They didn't turn out half bad either :)

What I learned yesterday about potato chips in cookies and biscottis:
- Potato chips, of the kettle-cooked, thick-cut variety do belong in cookies at least sometimes.
- Mixing the mix-ins into cookie dough is better with hands because you get a more even distribution, but your hands can get sticky, but whatever.
- Biscottis are essentially a twice-baked biscuit, but because they are baked twice, it takes a tad longer to make them.
- Biscottis are a lot easier to make than one would think - you should give it a try too!!
- It is apparently possible to bake a batch of drop cookies and a batch of biscottis within 90 minutes. It's just kind of stressful. (Holiday baking should be more on the stress-free side of things.)

Chocolate chip potato chip cookies, in all their glory.
First stage baked biscotti. The once thinner logs expanded into blobs of biscotti biscuit thing. You should bake it until it's a bit golden brown, but I didn't have time for that. Yours will likely look miles better than mine!
After being sliced, they looked more biscotti-like. They would have looked a bit better if I wasn't in such a hurry, or at least I'd like to think so? Into the oven for the second, and final bake!
A drizzle of white chocolate makes them a bit more magical, don't you think? I decided on white chocolate since there was dark chocolate in the cookies, but you could go with any chocolate, or multiple kinds of chocolate if you wanted to :)
Chocolate Chip Potato Chip Cookies (Adapted from How Sweet It Is)
*Makes 16 large cookies*
1 1/2 all-purpose flour
1/2 tsp baking soda
12 Tbsp extra virgin olive oil
1 cup white granulated sugar
2 eggs
1 Tbsp vanilla extract
1 1/2 cups crushed kettle-cooked thick-cut sea salt potato chips
1/3 cup dark chocolate chips

1. Preheat oven to 325 F. Prepare 2 cookie sheets with olive oil or parchment paper. (I had to use olive oil for most of the baking because I ran out of parchment after one cookie sheet!)
2. Mix olive oil and sugar in a medium bowl until combined.
3. Add eggs and vanilla and mix until combined.
4. Add flour and baking soda and mix gently until combined.
5. Fold in crushed potato chips and chocolate chips. It's easier to ensure a more even distribution if you use your hands, but it gets a little messy.
6. Drop 16 balls (about 3-4 Tbsp big) of cookie dough onto your cookie sheet, leaving space in between them to expand.
7. Bake in the oven for 12-15 minutes. You don't want to make the cookies too crunchy so that you have a good textural contrast, so don't wait until they're golden brown. Well, you could, but trust me. It's better this way. :)
8. Allow to cool and enjoy!

Cranberry-Almond Biscottis (Adapted from All Recipes)
*Makes ~24* (I made 23, But I could have totally made another one if my slicing was better.)
1 2/3 cups all-purpose flour
1 tsp baking powder
1/2 tsp salt
1 Tbsp vanilla extract
2 eggs
1/4 cup extra virgin olive oil
1/2 cup white granulated sugar
1/2 cup dried cranberries
1/3 cup whole roasted almonds

1. Preheat oven to 325 F. Prepare a cookie sheet with olive oil or parchment paper.
2. Mix olive oil and sugar in a medium bowl until combined.
3. Add eggs and vanilla and mix until combined.
4. Add flour, baking powder, and salt. Mix gently until combined.
5. Fold in dried cranberries and almonds.
6. Shape the dough into 2 equal sized logs about 12 x 2 inches, Try not to make the center taller than 2 inches.
7. Bake in the oven for 30-35 minutes.
8. Remove from the oven and allow to cool for 5-10 minutes before slicing. Use a sharp knife (or cleaver) to slice the logs diagonally into 1 inch thick pieces. You can make them thicker, but be aware that thicker slices will take longer to bake/dry.
9. Place biscotti slices flat on the cookie sheet. Reduce heat to 300 F and bake for about 10 minutes or until they are dry and a bit golden brown around the edges.
10. To make them slightly fancier, melt some chocolate with about 1 Tbsp olive oil, and drizzle over top. Allow to cool completely, and enjoy with some coffee or tea!

P and I were at Winners looking for Christmas cards and stuff, and I came across these cute little trays. For $4, you got 4 easy-to-assemble cardstock boxes with 4 strands of red ribbon, 4 snowman tags, and 4 tall cellophane bags. I used the tags to label them so that people knew what they were at the party. :D
Thank you, Winners for your cool cooking and baking stuff, and for encouraging my obsession with stationery and crafty things  don't really need, but buy from you anyways.
All ready to go! Chocolate chip potato chip cookies on the left and cranberry-almond biscottis with a white chocolate drizzle on the right! (I labeled the cookies as "chocolate chip" before the "potato chip" part, so people wouldn't be like "potato chip cookies...hmmm" and would instead be like "chocolate yay!!")
Happy holidays and may your homes smell oh so very magical~

12/09/2014

B-b-b-baking: Layered with Love

Tonight, I made dinner for my parents. It happens every now and then, and today was one of those days. My parents had stuff to do until 9:30 tonight, giving me ample time to put something together. I decided to tackle homemade lasagna from scratch.

What I learned tonight about lasagna:
- Humidity matters. It was wayyy easier to roll pasta manually when I was in London. Here, I had to do the chill and rest trick, and my arms got tired. I think I want a pasta roller...
- Be careful when cooking with wine. I actually added too much red wine to start with, so when I tasted it before assembling the lasagna, it was rather boozy. Surprise! I managed to even it out by adding beef broth and reducing it again afterwards...
- Tomato paste probably makes for a better sauce. It's not to say that this one didn't turn out, but it was not very tomato-ey. The red pepper was likely a factor too, because the flavour of bell peppers is quite strong. I was trying to use whatever was in the fridge.
- It only took me about 2 1/2 hours to make, although, I did skip the bechamel. Curse my stomach and its inability to deal with milk things!
- It's probably not a good idea to fill your baking pan to the rim. The cookie sheet that I put underneath helped, but I had to scrub off burnt overflow after dinner :/ 
- Making this makes you feel super accomplished. I'd highly recommend giving it a try!

Clearly, I need to work on my serving skills, but yay! Lasagna was made!
3-Layered Meat Lasagna from Scratch (Adapted from Smitten Kitchen and Half-Baked Harvest)
*Makes 8 servings*

Sauce
1 medium onion
4 cloves of garlic
1 lb. ground beef 
6 white mushrooms 
1 red bell pepper
1-28 oz. can of peeled, whole tomatoes
2/3 cup beef broth
1/3 cup red cooking wine
Basil
Salt and pepper
Olive oil

Pasta
2 cups all-purpose flour
1 tsp salt
4 eggs

Assembly
1 1/2 cups sliced or shredded mozzarella cheese

1. Add 1 tbsp olive oil into a medium pot over medium heat.
2. Chop garlic and onion, and saute in the pot until fragrant. 
3. Add ground beef, and stir until the meat is no longer pink, adding about 1/3 cup red cooking wine half way through.
4. Empty the can of whole tomatoes into a blender and pulse a 2-3 times with basil, salt, and pepper to your discretion.
5. Add the tomato mixture into the pot with the beef, and stir until combined, then bring to a boil.
6. Slice mushrooms and bell pepper, and add into the pot, bringing the heat down to a simmer. Allow sauce to reduce to desired consistency, stir, and remove from heat.
7. In a medium bowl, add flour and salt, and make a well in the middle.
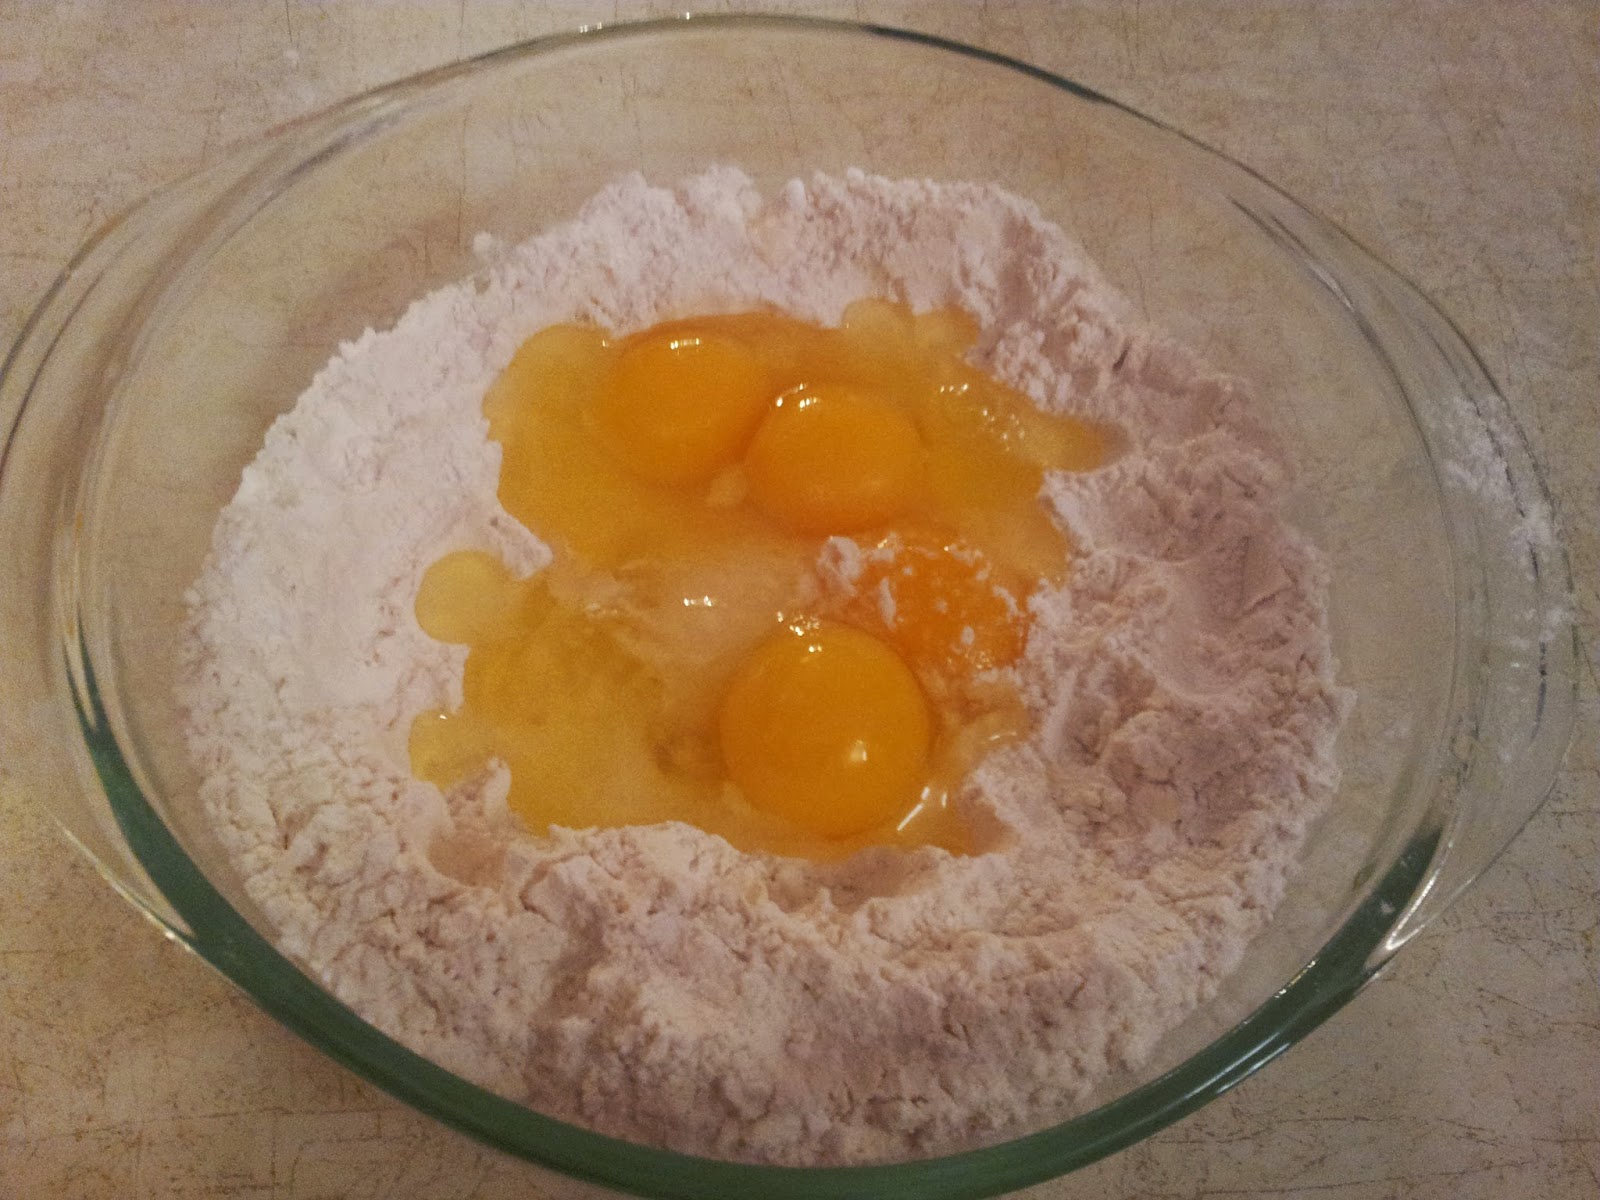
8. Break 4 eggs into the well, and stir with a fork until roughly combined. Knead until it comes together.
9. Divide into 4 portions. Keep other portions in the bowl covered with plastic wrap while you work with each one. 
10. Individually roll each portion of dough into a flat rectangle to fit the bottom of your baking pan (the pan I used was 7 x 12 x 2"). If you find that the edges of the dough begin to spring back when you are trying to flatten it, it's being overworked. Loosely roll it up, wrap in plastic wrap, and allow it to rest in the fridge while you work on another portion. After at least 5 minutes of resting in the fridge, take the dough out from the fridge, unroll, and continue to roll it out to your desired size. 
11. Use a paper towel to grease the inside of your baking pan, preheat your oven to 375 F, and begin layering. 
12. Start by spreading about 3 cups of the sauce in the bottom of your baking pan. Lay 1 sheet of fresh pasta over it, cover with a layer of cheese, and repeat these steps until your baking pan is full. The last layer should be a generous amount of cheese. I found that for the pan that I used, I had 1 sheet of pasta leftover. I plan to slice it into tagliatelle to have with the leftover sauce.
13. Place the baking pan on top of a cookie sheet in case any of it spills over (mine did a bit ._.). Cover with foil, and bake in the oven for 1 hour. After 45 minutes, remove the foil, and bake uncovered for the remaining 15 minutes. 
14. Remove from oven and slice into 8 squares. Serve with salad and/or bread. (I opted for a salad with romaine lettuce, mandarin oranges, sliced almonds, and a balsamic-honey vinaigrette.)
15. Enjoy!

Saucy! I had probably 2 cups leftover of sauce. Good enough for the leftover sheet of pasta! 
Preparing to get messy...
The first layer of meat sauce, pasta, and cheese. This was probably my best looking pasta sheet of the 4. One of them resembled a large oven mitt.
All assembled and ready to bake! Spoiler alert: It's also too full.
The finished product - this is what it looks like when you're too lazy to grate all of the cheese and/or when you need to spread the cheese sparingly. And when you fill the baking pan too high so that stuff overflows when it bubbles in the oven, and you have this mixed combination of feeling accomplished for finishing your masterpiece, relieved that you can finally eat, and reluctant to do the dishes afterwards.
I love having lasagna once in a while, and it's good for serving multiple people. I've gotten so accustomed to making enough food for 1 or 2 people, that I'm somewhat limited when it comes to making food for other people that isn't dessert. Thank goodness for stews and casseroles!

Until next time, Christmas baking is soon to come...

-M

11/19/2014

Love for the Locals: Remedy Cafe

I'd like to introduce you to my favourite spot in Edmonton for a good Chai tea latte, as of a year and a bit ago - Remedy Cafe. I meant to write about it much earlier, but only remembered to do so after having revisited the place last night!

Remedy Cafe, where the slogan is "Be Spicy - Drink Chai!", isn't your ordinary cafe. In addition to its assortment of coffees, teas, and desserts, Remedy serves quality East Indian/Pakistani food. Remedy Cafe offers full meals of rice and curries, as well as some great deals including the "2 Chai lattes and 4 Samosas" combo for only $12.50. As well, most of Remedy's baked goods and savoury eats are of the vegetarian, vegan, and gluten-free sort, so in addition to the options of 1% or 3% milk to be added to your beverages, you may also opt for soy or almond milk.

There are 4 locations in Edmonton - 1 in the University area on 109 Street, 1 on Whyte Ave, 1 on 124 Street, and 1 downtown on Jasper Ave - with a new cafe-to-be in the Terwillegar neighbourhood on the southside!

Each location gives you a bit of a different experience. All are run by hipsters, as seems to be the case with many cafes and coffee shops these days. P first brought me to the University location, and we have since been back at least a couple of  times. The location in the University area tends to be louder in terms of the music being played in the background as well as the people that hang out there. Not the best place to study, but there's a really neat vibe if you sit upstairs by the windows when it's rainy out. The staff also tend to be a bit more laidback, which can be good and bad at times. I find myself preferring the downtown location the most (so far). The music is played at a more comfortable volume, there's a bit more space, and there's better lighting. Service is also arguably a bit better at the downtown location because they give you a number to take to your seat, and bring everything to you, whereas you're expected to wait and pick up your order from the counter at the University location. It's also a nifty feeling to be at a cafe in the middle of downtown at night :)

All locations are open from 7:30am until midnight Monday to Friday, and 8:00am to midnight on Saturday and Sunday.

Remedy Cafe at 10279 - Jasper Ave.
Mini bar seat area.
Hustley-bustley downtown location around lunch hour on a weekday.
Diverse assortment of furniture and weird lamps. Love.
High tables and high chairs?
The Kashmire Chai - a delicious Chai latte topped with pistachios and rose petals. This is good at any time of the day. I highly recommend it.
Traditional Chai - another delicious Chai latte topped with ground cinnamon. Quite nice too! :)
If Chai isn't your thing, there are so many other kinds of tea to choose from, but to be honest, if you don't have their Chai at least once, you are missing out.
The 4 Samosas that came with our Chai lattes last night. They were filled with potatoes, peas, and delicious spices. So good...
The hallway leading to the washroom in the downtown location has chalkboard walls with multiple colours of chalk for you to draw and write things with. Fun!
Remedy Cafe makes for a nice date or relaxed hangout with friends. Their hours and products make it suitable for breakfast, lunch, dinner, or a late night thing! Thanks to P, this is one of my go-to spots in Edmonton for a smooth latte and a snack (usually a slice of cake or some samosas). I have yet to try any of their curries or even half of the kinds of cake they serve...all the more reason to return! But please for the love of all that is good in the world, try their Chai for me.

-M

Remedy on Urbanspoon

11/02/2014

B-b-b-baking: The Gastronomicon/Necro-om-nomicon

After a two month-long hiatus, I figured that I should get back to blogging! It has been insane lately... For instance, I recently attended my graduation from library school - I am a Master of Library and Information Science! I hope to resume posting at least once or twice a month, but please bear with me while I re-adjust to life :) And what better time to return to writing than to recapture one of my favourite days of the year, Halloween?

This year, P and I enjoyed a quiet, low-budget Halloween at home with homemade dinner and a movie. I tackled the "Gastronomicon", a ghastly but tasty homage to H.P. Lovecraft's "Necronomicon", originally crafted by Elizabeth Ellis on her own Blog of the Fed! H.P. Lovecraft was a horror fiction writer of the 1920s, and is well-known for his stories encircling the "Necronomicon" (or "Book of the Dead") and "Cthulu". His stories are one of my guilty pleasures that I enjoy time after time. You can learn more about H.P. Lovecraft and his other creations on The H.P. Lovecraft Archive.
My 9 x 13" monstrous masterpiece! I am happy to report that we succeeded in consuming the entire thing on Halloween night. :)
The "Gastronomicon" (Adapted from The Blog of the Fed)
2 cups all-purpose flour
1 Tbsp granulated white sugar
1 tsp table salt
1 cup warm water
1 packet of quick-rising yeast
1 Tbsp olive oil 
Pizza sauce or tomato-based pasta sauce
2 cloves of garlic (for the eyes)
2 black olives (for the nostrils)
Onion (for the teeth)
Shredded cheese 
Your other desired toppings

1. In a small bowl, combine the water, quick-rising yeast, sugar, and salt. Stir gently until dissolved.
2. Add the flour to a large mixing bowl.
3. Add the yeast mixture into the flour, and mix until combined.
4. Knead the dough, then form it into a ball. It'll be quite sticky at first, but keep kneading until it no longer sticks to your hands.
5. Smear oil on the inside of the mixing bowl, and place the ball of dough in the center. If you use an herb-infused olive oil, it makes the dough smell really good, and you can save on buying fresh herbs! I used the oregano-infused extra virgin olive oil from Oliv!
6. Cover the mixing bowl with plastic wrap, leave it in a warm place, and allow it to rise for at least 1 hour. The air can be dry and cool in Alberta, so I like to put the covered bowl into the microwave *turned off* along with a mug full of hot water. While the dough is rising, you can use some time to prepare your toppings.
7. Once the dough has doubled in size, prepare a baking sheet with parchment paper or non-stick spray, and preheat your oven to 400 F.
8. Remove the dough from the bowl, and knead it a couple of times to incorporate the olive oil.
9. Gently press and spread it until it evenly fills the pan's surface, and sculpt the face of the Necronomicon on the surface of your pizza dough. It works well to create ridges that stick out a bit to pronounce the facial features.
10. Coat the surface of the dough with sauce, right to the edges so that no piece lacks it. I tend to use pasta sauce more often than purchasing actual pizza sauce, because it's what I have on hand. Still super delicious!
Saucy and evil, just the way I like it :P
11. Add toppings to your heart's content! Aside from the garlic, olives, and onion, I opted for diced tomatoes, spicy genoa salami, sauteed mushrooms and onions (prepared by P), and of course, shredded cheese (We got the pre-shredded "Pizza" one by Kraft that has mozzarella, cheddar, and provolone). I forgot to get baby shrimp that I could use for maggots. The Necronomicon didn't have maggots as far as I know, but it would have looked pretty awesome!

Toppings galore!
12. Bake in the oven for 15 minutes, until the cheese is super melty and kind of bubbly.
13. Enjoy with a bloody-coloured beverage, and hope that your Gastronomicon doesn't attempt to devour your soul from inside your stomach! >:)

If making sparkling cranberry juice like I did, be sure to use at least 2 thirds cranberry juice to 1 third 7-Up/Sprite, or it'll just taste like cranberry-flavoured 7-Up, unless that's what you like. To each their own...
I hope you all had a Happy Halloween! :D

-M